
|
Edward Lowton
Editor |


|
| Home> | Production Engineering | >Machine centres and tools | >Specialist services |
ARTICLE
Specialist services
25 January 2013
William Hughes, manufacturer of springs, bent wire-forms and assemblies, is responding to industry demand for single source solutions with new 'added-value' services. Among the new controlled processes are steel and g

William Hughes, manufacturer of
springs, bent wire-forms and
assemblies, is responding to industry
demand for single source solutions
with new 'added-value' services.
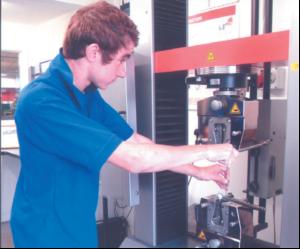
Among the new controlled processes are steel and glass shot peening, ultrasonic cleaning and tensile testing to national standards such as AMS (Aerospace Materials Specifications).
Steel shot peening involves firing or blasting a known size of cut wire shot at a component, such as a spring, to create compressive residual stress layers that modify its mechanical properties. For many tasks, the aim is increased spring longevity. The process is defined by quality, size and intensity of shot, with established measurement techniques used to calculate how much stress is delivered.
After every eight machine working hours, the size of the shot is checked using a sieve shaker with different mesh sizes to ensure the shot size is correct. Visual screening under magnification checks shot quality, confirming it to be round and without sharp edges. Other tests include arc rise tests, using an Almen strip to measure shot intensity, and coverage testing.
The company also offers shot peening using glass, a finer and smaller media, that allows shot peening without contaminating component surfaces.
MORE FROM THIS COMPANY
- Ultrasonic cleaning
- £1/4 million investment
- 3D measurement scanner helps boost accuracy
- European operations expanded
- William Hughes celebrates twenty years of growth and customer success at its class-leading Bulgarian factory
- Bulgaria success
- Bulgarian growth
- Salt spray testing keeps a check on corrosion
- More springs join range
- Passivation explained and demonstrated
OTHER ARTICLES IN THIS SECTION


